Now we're going to look at how to combine two insulins-one faster-acting and clear and one slower-acting and cloudy. The cloudy insulin will need to be resuspended before using it.
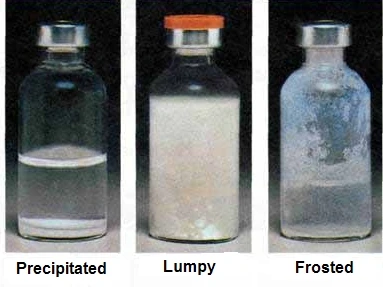
Before each use, take a moment to inspect the insulin prior to drawing it into the syringe; clear insulins should appear not discolored and clear; suspended insulins should be uniform in their cloudiness. [1][2]
Three visual examples of damaged insulin.
|
Do not use the insulin if:
See Insulin problems for more information about "bad" insulin. | ||
If you need to learn how to draw only one insulin in the syringe, see Drawing insulin.
| Step One | |
|---|---|
 |
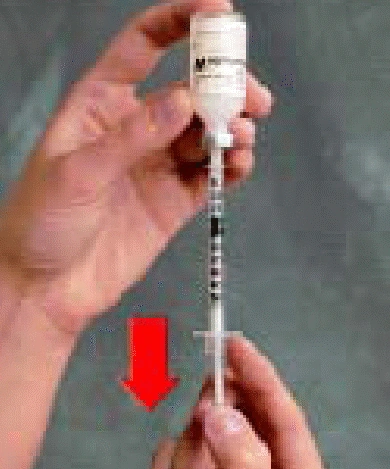
Remove the needle cap and pull the plunger down to the number of cloudy insulin units you intend to inject. You want the amount of "air units" to equal the amount of cloudy insulin units you'll be drawing from the vial. |
| Step Two | |
|---|---|
 |
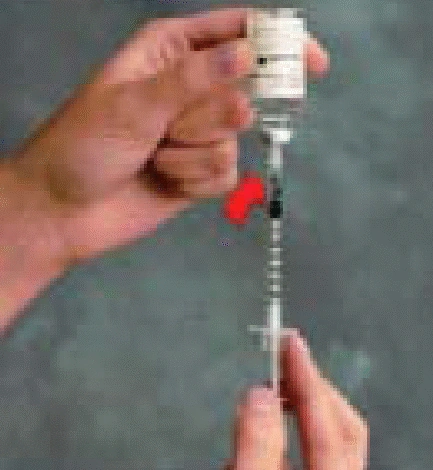
Push the needle through the cloudy insulin vial's rubber stopper. Inserting the needle all the way into the vial makes it less easy to bend. [10] If you should bend a needle while drawing insulin, discard the syringe and start again; don't try to straighten it out. [9] |
| Step Three | |
|---|---|
 |
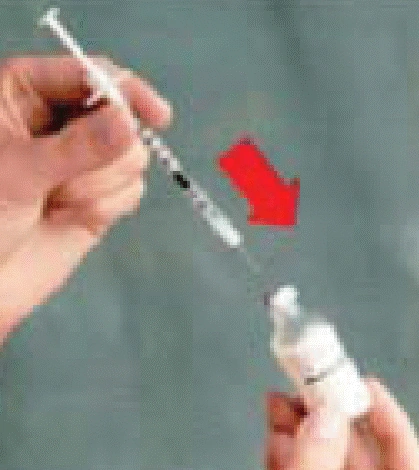
Inject the "air units" you drew up a moment ago (equal to the number of cloudy units you will draw from the cloudy insulin vial) into the vial. This will maintain air pressure equilibrium in the vial once you draw the dose and, because the vial is upright, will not cause air bubbles. Do NOT try drawing insulin from the cloudy insulin vial yet. Remove the needle and set the cloudy insulin vial aside to use later. |
| Step Four | |
|---|---|
 |
Pull the plunger down to the number of clear insulin units you intend to inject. You want the amount of "air units" to equal the amount of clear insulin units you'll be drawing from the vial. |
| Step Five | |
|---|---|
 |
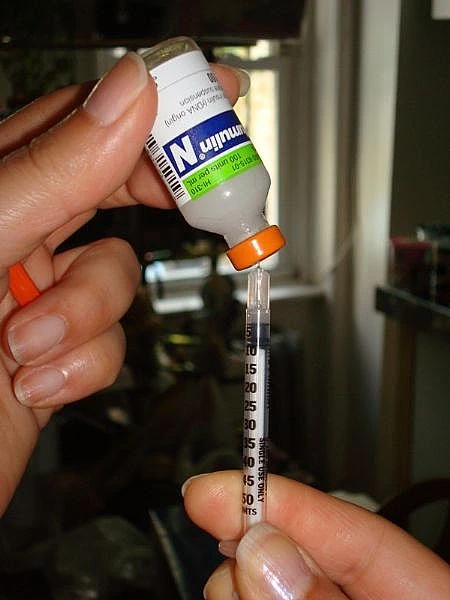
Push the needle through the clear insulin vial's rubber stopper. |
| Step Six | |
|---|---|
 |
Inject the "air units" you drew up a moment ago (equal to the number of clear units you will draw from the clear insulin vial) into the vial. This will maintain air pressure equilibrium in the vial once you draw the dose and, because the vial is upright, will not cause air bubbles. This time, leave the needle in the clear insulin vial. |
| Step Seven | |
|---|---|
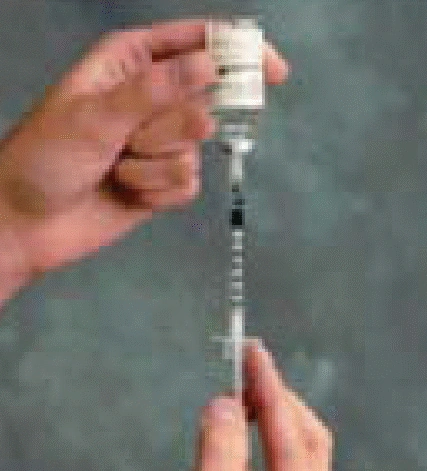 |
Turn the clear insulin vial with the syringe still stuck into it upside-down. |
| Step Eight | ||
|---|---|---|
|
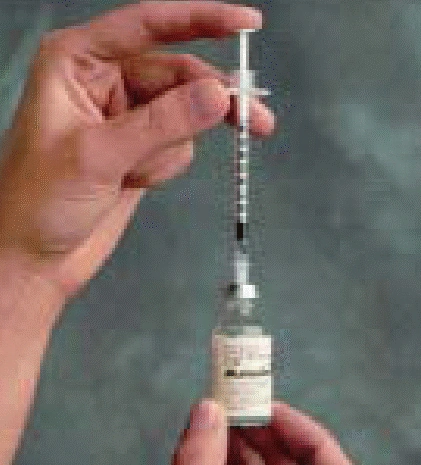
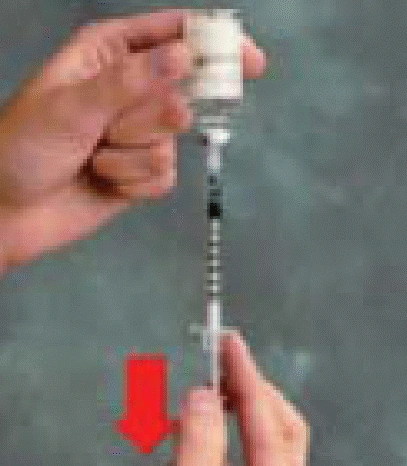
Note how the vial is held while drawing the insulin--at a slight angle, tilted so that the air space in the vial is at the opposite side the needle is drawing the insulin from; this helps reduce the possibility of bubbles in the syringe. | |
 Drawing insulin. |
Pull the syringe plunger slowly to get the insulin into the syringe, making sure you are drawing up the right number of units. If you draw too many, you can push then back into the vial from the syringe; the important thing is that the drawn dosage is correct. | |
| Step Nine | |
|---|---|
 |
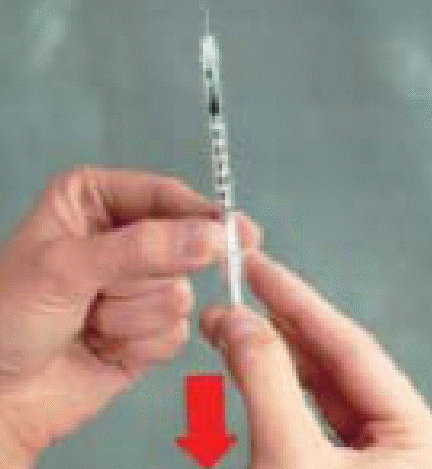
If you find bubbles, push the entire amount of insulin in the syringe back into the vial and start from step eight again.
If you do get air bubbles into the syringe, it's ok with most insulins to re-inject the insulin into the vial and draw again until the air is gone. [7] Check that this is ok with your insulin. See also injecting insulin. Slower draw is less likely to draw bubbles. Remove the needle from the clear insulin vial. |
| Step Ten | |
|---|---|
 |
Push the needle through the cloudy insulin vial's rubber stopper. You don't need to inject air into the cloudy insulin vial because you did this before you drew up the clear insulin. The vial's equilibrium was taken care of when you injected air into it when you began. (You also have a syringe that now has the prescribed dose of clear insulin in it.) Turn the insulin vial with the syringe still stuck into it upside-down. |
| Step Eleven | ||
|---|---|---|
|
Note how the vial is held while drawing the insulin--at a slight angle, tilted so that the air space in the vial is at the opposite side the needle is drawing the insulin from; this helps reduce the possibility of bubbles in the syringe. | |
 |
This time, you can't push any insulin back into the vial because you have the clear, faster-acting one already in the syringe. Remove the syringe from the vial and put the needle cap back on the syringe; you're now ready to give an insulin shot. | |
References[]
- ↑ Insulin Therapy-Stability & Storage. RxEd.org.
- ↑ Keeping an Eye on Your Insulin. Diabetes Health (2001).
- ↑ Benson EA, Benson JW Jr, Fredlund PN, Mecklenburg RS, Metz R. (1988). Flocculation & Loss of Potency of Human NPH Insulin. Diabetes Care-American Diabetes Association.
- ↑ Playán J, Acha J, Navarro H, Sanz A, Guallar AM, Albero R. (1994). Flocculation of NPH Insulin. Revista Clinica Espanola-(English Translation).
- ↑ 5.0 5.1 Rosskamp, Ralf H., Park, Glen (1988). Frosting Caused in NPH/Isophane Insulin By Heat/Cold. Journal-Diabetes.org.
- ↑ Definition of Flocculation. Dorlands Medical Dictionary.
- ↑ 7.0 7.1 7.2 Storage & Safety-Frosting of NPH, Lente, Ultralente Insulins-Page 5. Diabetes Forecast (2006). Cite error: Invalid
<ref>tag; name "Storage" defined multiple times with different content Cite error: Invalid<ref>tag; name "Storage" defined multiple times with different content - ↑ Humalog & Heat. Diabetesnet.com.
- ↑ 9.0 9.1 Injection Insulin-Transcript of American Diabetes Association Videotape. American Diabetes Association (2003).
- ↑ Diabetes Mellitus. Washington State University.
More Information[]
- Using Insulin Pen Cartridges/Penfills with Syringes-Drawing Clear and Cloudy-Page 2 BC Childrens Hospital